In this tutorial i want to show you how build a simple but practical turntable, so you can start with the 3d scanning of your miniatures.
When I want to build terrain or storage boxes for my tabletop games, I always look for material that is as cheap as possible, easy to work with and dimensionally stable.
That’s why I eventually ended up at Depron, a polystyrene-like material that is used in model aircraft construction. I build almost everything with it. It is lightweight, easy to cut and relatively resilient due to its fine-grained structure.
I will now show you here how I built my 3d scanning setup with it.
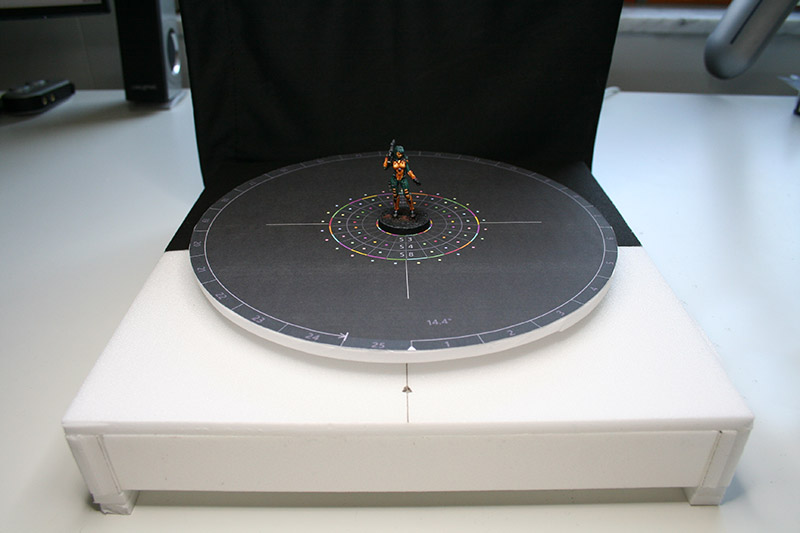
Step 1: Prepare the parts
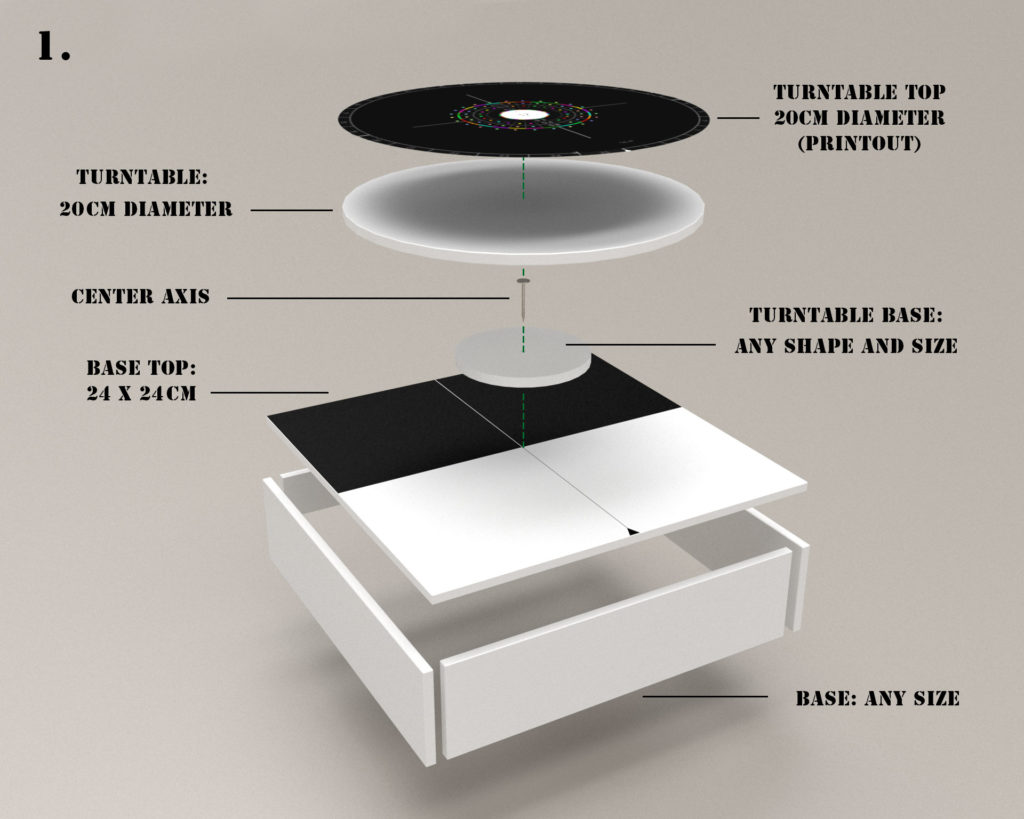
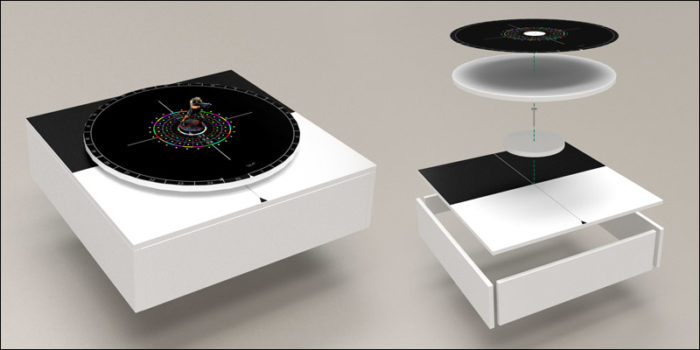
Here you see all the parts that are needed. It is all made out of 6mm depron plates. We will go through the parts starting from the bottom.
The base top: I made a 24×24 cm base top, added line to mark the center and painted one half black. This is important because this part will be on your photos later on, and we want everything around the miniature to be dark. The front part of the base will never be seen on your photos, so leave it as it is. I added a little arrow at the front edge, this will help me to turn the actual turntable by the exact amount.
The base: Put the base top on a base of any height, so give it a bit of stability and to be able to place it under your LED lamp. My lamp has a quite bulky stand, so i need a height of 4cm. This will of course differ from your own needs.
The base gives your whole setup a certain stability. When you have your heavy S8 TAG standing on the turntable and rotate it for each photo, the rest should not swing or wobble. For this you should install at least one cross brace at the front.
The center axis: A big name for a simple nail.
The turntable: A simple disk, 20cm in diameter, i recommend to add lines that go through the center at the underside. This will help to center it later on.
I prepared some graphic for the top, with positioning aids, colored reference points for the scanning software and 25 segments at the outer rim, so that you can take your 25 photos conveniently. This thing already went through iterations while i gained experience and worked out what i really needed. I am very satisfied with this version now.
Download the PDF, cut it out and glue it on the turntable top.
You may have noticed a second disc, i called it Turntable Base, beneath the actual turntable disc. This can be of any size, even any shape. It is there to ensure that the nail, that serves as our center axis, does not stick out.
In this case your miniature that is standing directly on it might wobble, especially with all the turnings we have to perform. The figure has to remain in its position, otherwise the scanning will fail.
Another advantage of this is, that the turntable gets some distance to the base and can be turned much easier.
Step 2: Assemble the base
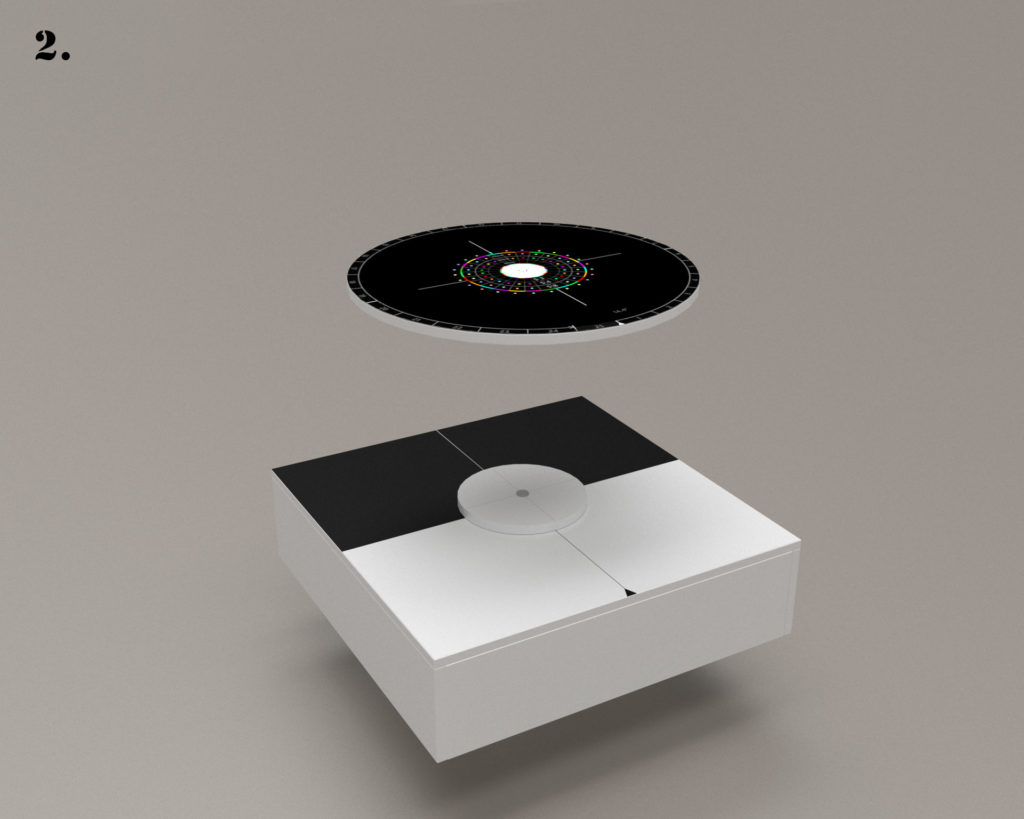
Glue the base parts together using craft glue or styrofoam glue. Stick the nail through the center of the turntable base and after that through the base part. Be sure to hit the center of the base, your marking lines should help you. It is important that the turntable turns around the center of your whole construction.
If you haven’t done it yet, cut out the turntable template and glue it of the turntable top.
Step 3: Assemble the turntable top
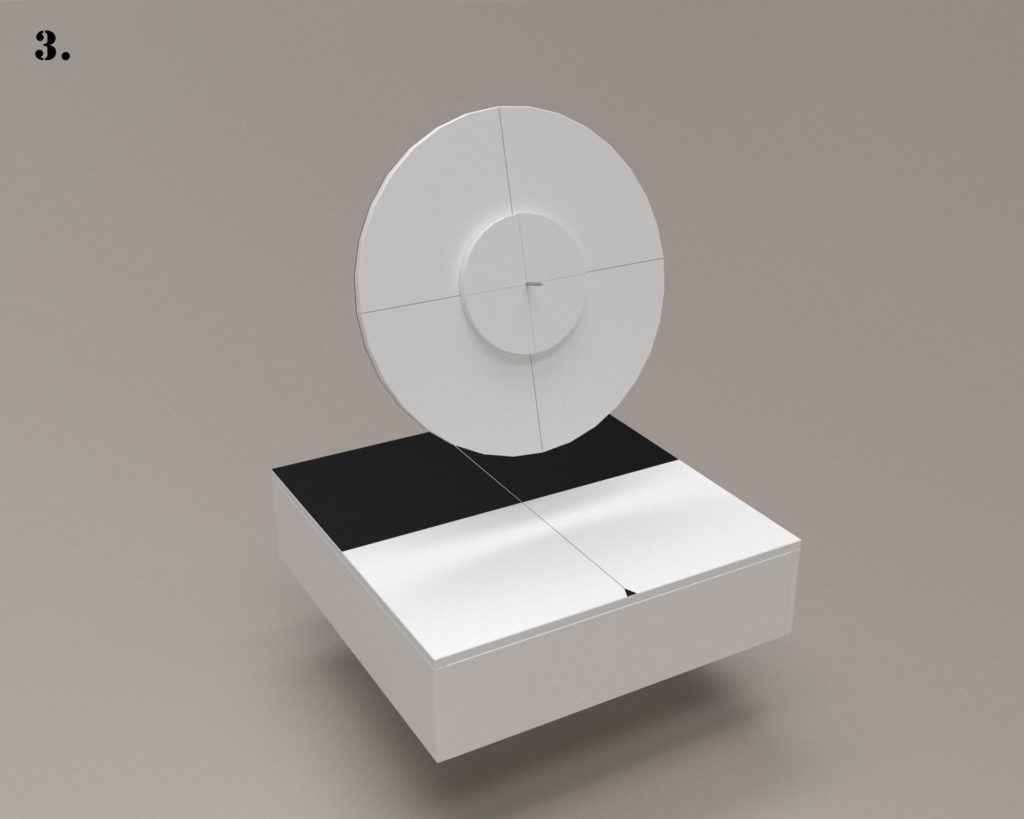
Now it’s time to glue to turntable on top of its base. This will also fix the nail. Again, having marked the center axis helps a lot to align both parts properly and to make sure that the turntable is centered out.
After it is fixed, stick it on top of the base.
Step 4: Start the scanning!
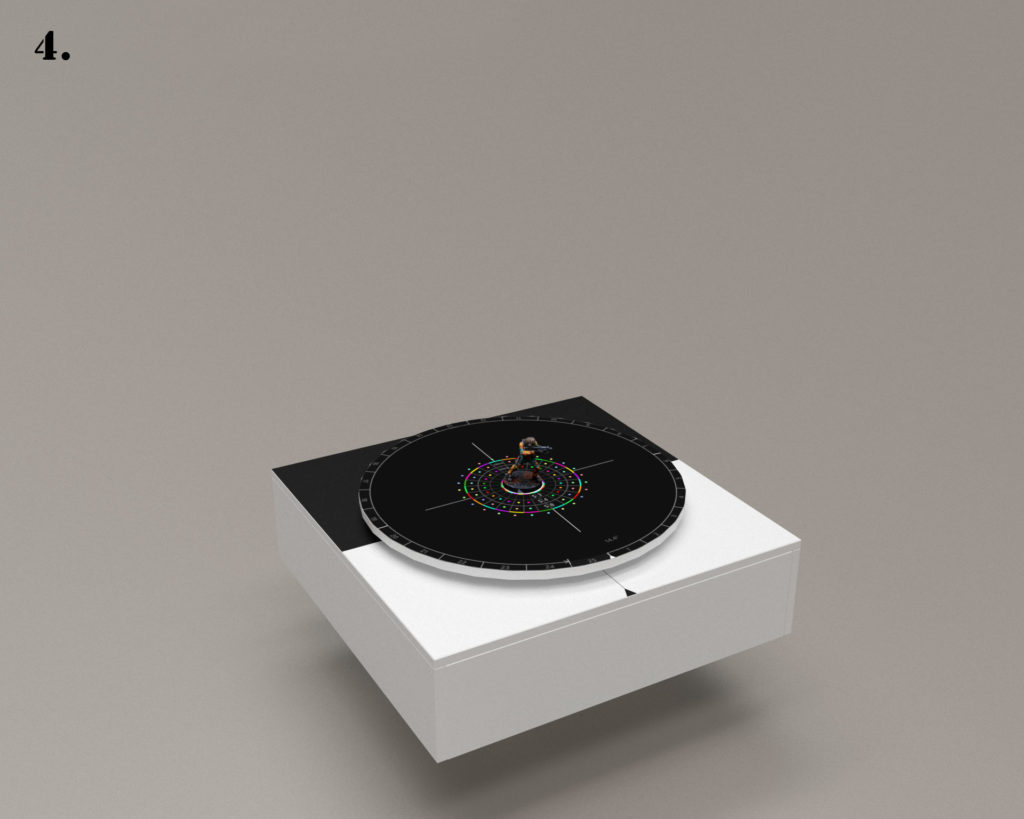
You’re done! Place the whole construction under your lamp, maybe add a black sheet of paper behind it as a backdrop, place your miniature and start scanning. 😀


Morning,
I need another template for the turntable to be able to do oval bases along with up to 150mm bases any help would be awesome. I have used your template and blender is failing to recognize the model due to it covering some of the coloured dots
Are you certain, that it fails because of the dots? In that case, you could paint some more dots around your oval base with acrylic colors, or place some colored objects around it and see what happens.
Maybe the rim of your turntable is white and visible in the images? I had some issues with that and painted it black. It seemed to confuse Zephyr and the processing of images taken from the lower angle failed.
Hi. I was wondering what you used to gloss the turntable.
I simply painted it with glossy varnish. Using glossy printer paper should also work.
This whole tutorial set has been a godsend during this past year. Thank you so much for doing it. I recently had some awkward models failing and found that if I set my camera at a slightly higher angle than dead on (say 15-20 degrees) and took 50 photos around your turnstile I got better results (instead of 25 at one angle and 25 at another). I just use your numbers and take a photo on the line and the center number to get all 50. The sparse cloud yields a good density of dots and the models come out very clear. Thanks again!
Thanks for the kind words, I am glad that the tutorial has helped you 🙂
You can certainly get good results if you only shoot one round. Whether 50 or 25 photos, that is even rather secondary. The two rounds from different angles should prevent blind spots and ensure that you capture as many corners of the model as possible. That’s the theory, for some models you have to see how it works and maybe adjust the workflow. The main thing is that it worked for your model and you are happy with the result!
From your experience, is it better for the miniatures to be glossed or not?
I would recommend to scan the miniature before you apply any kind of varnish. Glossy varnish will reflect the lights of your camera setup and you will get litle white spots on your mini. Varnish can also alter your colors a bit, they will appear darker because of changed reflectivity.
If you have already applied glossy varnish, you can add a layer of matte varnish to reduce the reflections.
Hello,
Would you please write up on how to create the turntable top? I want to create a new one for Warmachine.
How to design own turntable topper? Photoshop? Want to create one for different base sizes please.
Yes, i did it in Photoshop. Just load the PDF in Photoshop and use it as a template for your own design.
Thank you! I have someone on fiver making me one! Thanks for your tutorials!